AI Chat integrated aerospace full-stack project
Why did I start this project?
From my previous ‘Aerospace Community Project,’ which is an Aerospace Q&A website built with Python-Django, I noticed several things and wanted to improve them:
- I realized no one is willing to post or answer questions on a random website.
- I couldn’t embody flexible UIUX control and features on a website built with Django.
- I wanted to build a website using a programming language specialized in web development.
- With the rise of ChatGPT, I found that people are familiar with chat interfaces, so I wanted this project to have the feature.

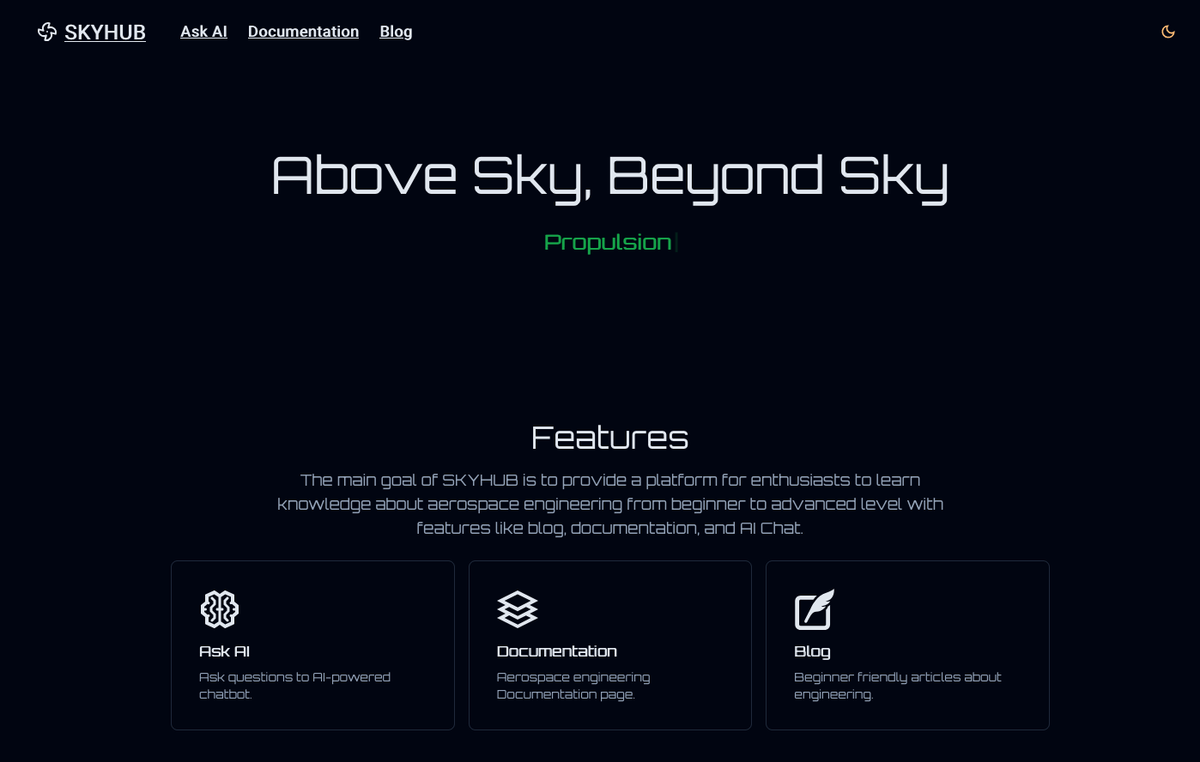
SkyHub Landing Page - Above Sky, Beyond Sky
Tech stack I used
- Typescript
- React/NextJS 13-app router
- Contentlayer
- Shadcn UI
- Tailwind CSS
- Vercel AI SDK
- Open AI API
- t3-env
- LangChain (early version)
- (Clerk Auth)
How did I build this project? (June 2023 ~ September 2023)
Typescript
Typescript is a superset of Javascript. While Javascript is a Dynamic high-level programming language, Typescript helps prevent production-level projects from having serious errors or security weaknesses.
Why Next JS?
After I did a couple of simple projects with pure React, I learned concepts between SPA (Single Page Application), SSG (Static Site Generation), and SSR (Server Side Rendering). On the surface, the website built with just React JS has no problem with the UI side, but it has limitations to SEO (Search Engine Optimization), like delivering static content to the client side.
These are the reasons why I chose NextJS for this project:
- Delivering static content was an essential original goal.
- Credentials or sensitive information are not included on the UI(Client side) using NextJS13’s new default “Server component,” while the UI side is handled by ‘use client,’ which is good for security.
- It was pretty annoying to set up routers in ReactJS at that time (for example, the syntax slightly changes whenever React’s new version is updated). However, NextJS provides a file-based or folder-based built-in router system.
- Need to communicate with the API easily.
MDX rendering on HTML
Before I built this project, I had a small side project like testing a blog website using the NextJS’s pages directory. Since the side project was using SSG (Static Site Generation), its contents were delivered and rendered through getStaticPaths() and getStaticProps() functions and a library called gray-matter
Unlike the SSG blog website, this project uses SSR (Server-Side Rendering), which only renders the page that the client requests. The SSR method was used because it reduces the build time and optimizes for a serverless host like Vercel. Serverless is a good option when users do not call the website via URL; it is in “sleeping mode.” It takes a little time when the website wakes up, but it’s too short for people to notice. This technology will save money when hosting a web project like on AWS. MDX was chosen so that I could use the React component inside of the markdown file.
ContentLayer
‘ContentLayer’ is a SDK that validates and transforms content into type-safe JSON data, making it easy to import into the application’s pages. It’s an open-source project written in TypeScript, and it’s designed to work with various content sources, including local content (Markdown, MDX, JSON, YAML).
When the project heavily relies on local markdown or MDX files as a CMS(Content Management System), as the number of files increases, it’s hard to check whether some ‘frontmatter’ was missing or wrong and what file was updated. Contentlayer offers a feature to track all of these.
Light/Dark mode
People have different preferences between light mode and dark mode. Most modern websites offer the light/dark mode toggle, so I wanted to make it. To be able to change the theme, I installed via npm i next-themes and created the Themeprovider.tsx to envelop the body of Layout.tsx.
"use client";

import { useTheme } from "next-themes";
import { MdOutlineLightMode, MdOutlineDarkMode } from "react-icons/md";

export default function ThemeButton() {
  const { resolvedTheme, setTheme } = useTheme();
  return (
    <button
      aria-label="Toggle Dark Mode"
      type="button"
      onClick={() => setTheme(resolvedTheme === "dark" ? "light" : "dark")}
      className="flex items-center justify-center rounded-lg p-2 transition-colors"
    >
      {resolvedTheme === "dark" ? (
        <MdOutlineDarkMode className="h-5 w-5 text-orange-300" />
      ) : (
        <MdOutlineLightMode className="h-5 w-5 text-slate-800" />
      )}
    </button>
  );
}
useTheme is like useState() in React. Whenever the user clicks the toggle button, the color state changes via the setTheme() function. The default theme is saved in resolvedTheme as the dark background color.
t3-env
While playing around with T3-stack, I found the ‘t3-env’. It prevents me from forgetting or using the wrong credentials for environment variables and reduces bugs during development.
Streaming Chat interface feature

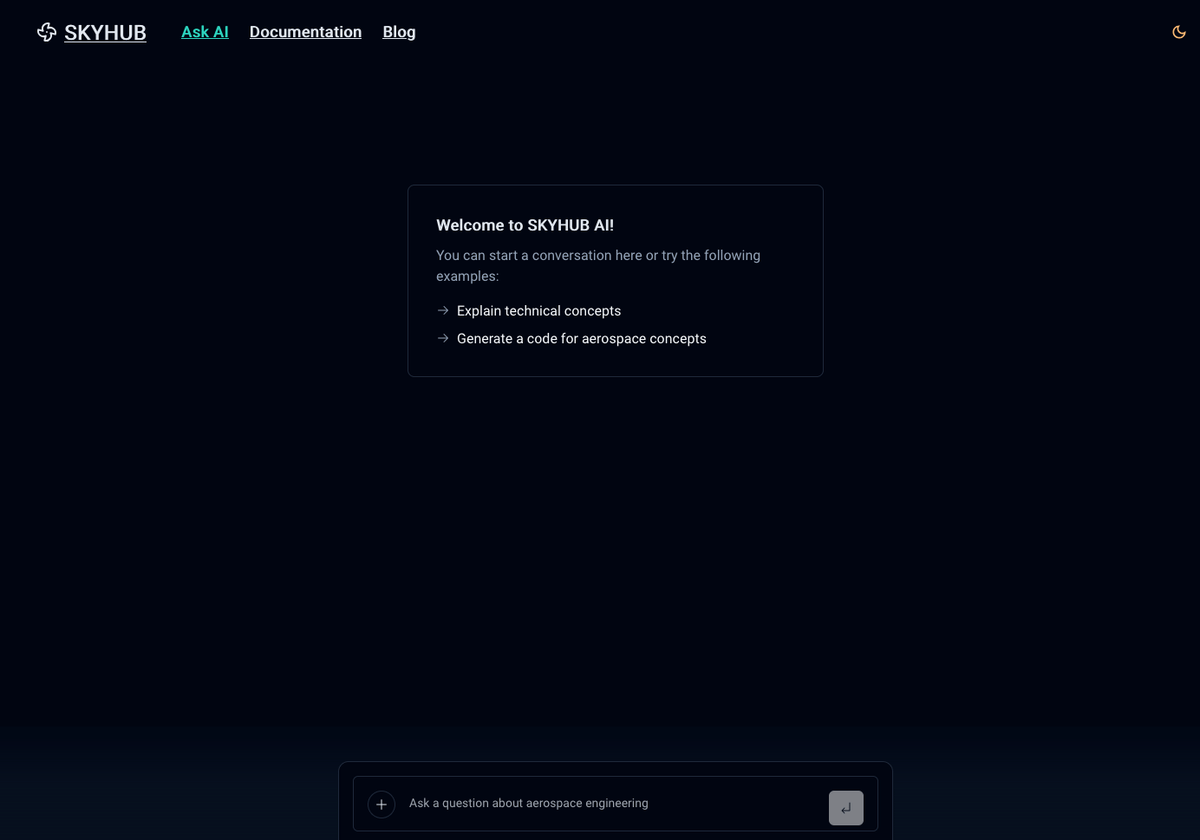
AI Chat Interface - Real-time streaming responses
Streaming refers to receiving and processing the AI model’s output in real-time as it generates the response. This feature is particularly useful for applications where the user interacts with the model and receives responses incrementally instead of waiting for the entire response to be generated before it is displayed, like ChatGPT. This functionality could not be achieved without the ‘Vercel AI SDK,’ LangChain, and OpenAI API.
The primary purpose of this project was to create a chat integration feature that only answers questions related to aerospace engineering. When a user enters the “Ask AI” page, the front end shows the introduction of AI, the example questions, the ‘input text area’ where the user types text to ask, and a button to send data or stop generating answers.
While it looks very simple on the surface, the behind-the-scenes aren’t. The sending data process was operated by form submission with an asynchronous function.
%% This is my example of a modified version of code %%
<form onSubmit={async e => {
	e.preventDefault()
	if (!input?.trim()) {
		return
	}
	setInput('')
	await onSubmit(input)
	}}
	ref={formRef}>

{/* Below Textarea is input part */}

	<Textarea ref={inputRef} tabIndex={0} onKeyDown={onKeyDown} rows={1} value={input}
	onChange={e => setInput(e.target.value)} placeholder="Ask a question about aerospace engineering" spellCheck={false}
	/>

	<Button type="submit" size="icon" disabled {isLoading || input === ''}>Send message</Button>
</form>
When the user types the text, presses the enter key, or clicks the submission button, the text data is asynchronously delivered to the API and waits for the response. To block multiple requests for the same text data, the sending button would be disabled. During the waiting time or streaming of response time, users can click “Stop generating” or “Regenerate response” like the code below.
%% This is my example of modified version of code %%
{isLoading ? (
	<Button variant="outline" onClick={() => stop()} className="bg-background">
		<IconStop className="mr-2" />
	Stop generating
	</Button>

) : (messages?.length > 0 && (
	<Button variant="outline" onClick={() =>reload()} className="bg-background">
	<IconRefresh className="mr-2" />
	Regenerate response
	</Button>
))}
On the front end, the form submission button calls the backend’s API with a “POST” request. The streaming feature provided by LangChain and the response from Open AI API are combined together and finally sent back to the front end. This is what the user sees.
Next Auth(aka Auth JS) vs Clerk
I had to do a research between Next Auth and Clerk to implement the auth feature for this project. Next Auth was more manual setup, but it gives me full control of the authentication system. On the other hand, the Clerk provides already easy-to-use options with limited control. Meanwhile, Next Auth was the beta version at that time, and ‘Clerk’ was more stable than that. My original plan was for users only to be able to use the AI Chat feature, but due to some unfixed errors, this project’s sign-up and log-in buttons are currently hidden on the front end.
Challenges I faced
- It was not impossible to figure out, but passing the props or data across client and server components was quite burdensome in the NextJS app router.
- The clerk glitched in the UI, could not be controlled, and couldn’t block unauthenticated users without sign-in. I tried to fix it with middleware but couldn’t figure it out at that time.
- Saving the chat history per user without setting up a database and ORM was impossible.
- The beta version of Contentlayer was not a good idea for the production model, especially for the blog and documentation features, because it caused some errors.
- Making it as responsive website as possible was a challenging thing for me.
- Setting “system prompt” to answer only aerospace-related answers was not enough, and sometimes it went wrong. For example, “It says it cannot answer it due to system message setup, but answer it anyway.” Also, it was easy to find weak points, as my friend tried: “How do you get a girlfriend as an aerospace engineer?” As long as it includes the keywords related to “aerospace,” it just gives hallucinated answers (wrong but pretend to be right).
What did I learn?
- Relying too heavily on products like Clerk isn’t always a good idea because I don’t always have full control.
- Using beta version tech for a production-level project was a bad idea.
- I need to understand how to train AI using specific data sets or PDF files and embed them into AI.
- No matter how many fancy technologies are used to make UIUX better on the front end, people who don’t know about web development do not recognize how much commitment was made to the project. That’s one of the challenges of full-stack development. If one of the features does not work perfectly, the website is considered bad.
This project’s repository is private because I want to use it as a reference for future projects. But, if you are interested in checking the website, here is the link: https://skyhub-neo.vercel.app/